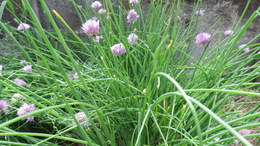
Chives Growing Guide
Onion Chives (Allium schoenoprasum) and Garlic Chives (Allium tuberosum) are both in the onion family and are perennial herbs that will do well in USDA Zones 3 to 9 and prefer full sun to part sun especially in the hotter southern zones.
They are native to the Mediterranean and are deer resistant.
Starting from Seed
Follow the seed packet instructions, seeds can be started indoors 8 to 10-weeks before your last expected frost date. Sow seeds 1/4-inch deep. Germination takes 10 to 14-days.
Transplants need a good head start in order to have enough growth to harvest this season. They can be direct sown in the garden, but harvest may be slim the first year.
Soil Preparation
The soil should be nice loose well drained organic garden soil with the soil pH between 6.2 to 6.8. As soon as the soil is frost-free and can be worked, till the soil by digging down 8 to 12-inches turning the soil over with a garden fork. Remove any large rocks and stones. The small stones remaining will do no harm and actually benefit the soil by adding some micronutrients to the soil.
Planting
Plant the chives in full sun to part sun in the garden after all danger of frost is past. Follow the plant tag instructions. Most are bought in pots which look like clumps of grass. It will be nearly impossible to divide them into individual plants, but you can take a sharp knife to divide the single clump into 2 or 3-clumps.
They will reach about 12-inches tall and 12-inches across. Plant them at the same depth as were growing in the pot, 10 to 12-inches apart.
Chives can be easily grown in containers outdoors as well as indoors in a very sunny south-facing window or under fluorescent lights. Use a well-draining potting mix keeping it moist.
Watering and Care
Chives have a shallow root system and require even moisture throughout their growing season. Water weekly if needed to keep the soil moist. Do not allow weeds to take over. When pulling out weeds be careful not to disturb the shallow roots. The best way to prevent weeds is to apply a 2 or 3-inch layer of mulch, which can be shredded leaves or pine straw shortly after the leaves appear.
You can eat the edible flowers, if not; remove them so that seeds will not be spread all over your garden. This will encourage the growth of more leaves.
Dividing Chives
Chives will be more productive if you divide the clump every 3 to 4-years in the spring before growth begins. You can give any extra divisions to your gardening friends or neighbors.
Harvesting Chives
Onion chives have hollow onion flavored leaves and pink flowers. Garlic chives have flat garlic flavored leaves and white flowers.
They are not grown for their bulbs, but rather for its hollow 8 to 12-inch leaves. The finely chopped leaves are used to add flavor to soups, stews, salads, dips and backed potatoes.
Allow the leaves to grow a bit and when the leaves are long enough to use you can begin to clip them. Do not cut the tops off; the best way is to take a small bunch of leaves from the outer part of the clump and cut the bunch about 1/2-inch above the soil level. This will stimulate the plant to grow more new leaves.
If you live in a frost-free area you can harvest chives during the winter months. Everywhere else the first freeze will cause the plant to go dormant during the winter. In the coldest growing zones place a layer of shredded leaves or pine straw over the clump. This is especially important for the garlic chives, which may only be hardy to zone 4.
Diseases and Pests
Chives are usually a disease and pest-free herb. Most of the fungal and bacterial diseases can be avoided by not over-watering and spacing your plants so that they get good air circulation.
Sources: Seeds Now, Burpee, Park Seed
Garden Spikes newsletters give you timely information once or twice a month. Subscribe Free to the Garden Times newsletter below.
Your email address will only be used to send you a newsletter and will never be sold. You can unsubscribe at any time.

