Raised Bed

A raised bed allows you to control the proper soil conditions needed for growing healthy and productive plants. The soil also warms up faster and drains better.
They are an easy type of a planting method in which the planting surface is raised above the surrounding soil.
They can be thought of as a type of container gardening. The raised bed contains the soil and at the same time delineates the planting areas and keeps the garden neat and looking orderly. The main difference that there is no bottom and are much larger.
Permanent raised beds are ideal for the home gardener. It allows you to have the highest quality of organic garden soil in your raised bed. There is no need to waste it in the aisles you will be walking on. The aisles can be grass, gravel or mulched with wood chips or shredded leaves. Keeping the aisles weed free and adding a few inches or shredded leaves around your plants will prevent almost all of the weeds from growing.
Using a soaker hose to is an ideal way to water your plants and to conserve water at the same time. It puts the water down to the roots of the plants where they need it without wasting water or causing run off.
What Are the Benefits?
A benefit of a raised bed is that it will warm up faster, which will get the soil microbes working sooner and make the micronutrients available for the roots to take in.
It is also easier to get the good garden soil your plants need without wasting it in the aisles that you walk on.
Raised beds also drain better and are easier to maintain. A nice layer of shredded leaves or another type of mulch means that there will be very few weeds to contend with. The weeds that do show up are very easy to pull out from the soft soil and can be left on the surface of the mulch to dry out and die. Adding more mulch will be beneficial in blocking the future growth of weeds.
A garden with raised beds gives it an orderly look, which gives it a neater and attractive appearance.
Temporary Raised Beds
Many farmers make temporary raised beds. They make long raised beds by pulling soil from the sides making a long raised planting bed with the lower aisles for walking on. This allows them to use machinery for tilling and planting and avoids the cost of raised bed materials.
Many gardens over time have become temporary raised beds due to the addition of garden soil from their compost bins as well as the addition of mulch which has broken down.
Raised Bed Materials
Some raised beds are purchased and put together from kits. They often are too small and not very sturdy, but are ideal for a beginner or someone who just moved into a new home and wants to quickly get a garden going.
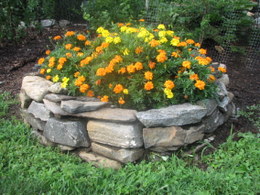
A simple ring of stones around a tree stump filled with soil and topped with marigolds looks attractive as shown above.
Cedar, redwood and black locust are more costly, but are good choices due to their rot resistance. The sides of most raised beds are usually made of wood, but stone, cement block or even logs can be used for the sides.
It is still a controversial subject on whether the new pressure treated wood should be used to make raised bed gardens.
The old pressure treated wood was not recommended for raised beds in the past because it contained arsenic. After 2003 the chemical process was changed so that the new pressure treated wood is now treated with copper, which is not considered to be harmful.
Several decades ago newspapers and magazines used inks that contained certain toxic heavy metals and petroleum based mineral oils. Today the inks used contain natural pigments and vegetable oil which are considered safe to use in the vegetable garden and composting.
To simplify things the U.S. Department of Agriculture (USDA) is involved in food safety, the Environmental Protection Agency (EPA) is involved in things that are harmful to the environment and the Occupational Safety and Health Administration (OSHA) is involved in the safety of workers in the work place. OSHA is often the driving force to remove harmful chemicals from the factory workplace, which then removes them from the end user and environment.
Make your own decision by doing your own research. In your favorite search engine, search for terms such as “raised bed pressure treated lumber” and “newsprint ink toxic” as the search terms. Read the many articles both pro and con to reach your own conclusion on the use of pressure treated wood for your raised bed and the use of newspapers as well.
The pressure treated wood used today on decks is considered to be safe for young children to walk on barefoot. Many sources recommend that pressure treated wood should be left out to weather, away from your garden, for several months before making your raised bed.
Low levels of arsenic are naturally found in soil, water and many foods. If you were to talk to some older gardeners, who are in their 80s or 90s what they used, they may tell you that they used what was available, which was railroad ties with creosote and the older arsenic treated wood. Plants are very selective in what they take from the soil, just as we are very selective in what we eat.
The older pressure treated wood was more decay resistant than the current pressure treated wood. If you use pressure treated wood it needs to be disposed properly when you replace it. A benefit of using untreated wood is that you can cut it up and safely burn it in a fireplace or chip it up to use as mulch.
Raised Bed Sizes

A raised bed can be any size or shape, but 4-feet wide is considered to be the maximum width to make it easy to reach into from either side. Common sizes are 4-feet by 4-feet, 4-feet by 6-feet and 4-feet by 8-feet. Raised beds longer than 8-feet start to have problems with the sides bowing out over time.
Square and rectangular are the most common, but triangular raised beds can be used to take advantage of a small space.
If you are placing your raised bed in an area with average soil a raised bed made from 2” X 6” lumber will be satisfactory.
If your raised bed is going to be placed on a patio or on hard gravely soil then making the sides from 2” X 12” lumber would be a better choice.
You also will need to consider the amount of good garden soil that will be required to fill the raised bed. A raised bed 4-feet by 8-feet and 6-inches high will take about 16-cubic feet of soil. One that is 12-inches high will take about 32-cubic feet of soil.
A typical bag of garden soil from a garden center will have a volume of 1-cubic foot and weigh about 40-pounds or more depending on its moisture content. A raised bed 4-feet by 8-feet and 6-inches high will require about 640-pounds of garden soil and if it is 12-inches high it will require about 1,280-pounds of garden soil.
A 3-gallon utility pail of average soil will weigh about 17-pounds. A recycled 5-gallon pail filled to the top will hold more than 5-gallons of soil and weigh about 33-pounds.
There are many writers out there which talk about building a raised bed 2 or 3-feet high with the claim that you can garden without bending over. They never go into the cost of building a high raised bed that is sturdy enough so it does not come apart in a few years. They also do not go into how much work is required to fill a high raised bed. How do you get to your staked tomatoes or pole beans?
Most of the common vegetables are shallow rooted and will grow very nicely in a raised bed that is made from 2 X 6” lumber. The only exception might be the long standard size carrot if the subsoil is very poor. Shorter varieties such as Danvers Half Long, Nantes Half Long and Little Finger are very popular.
Building Your Raised Bed

Decide on the dimensions and height you want the raised bed to be. When purchasing the lumber make sure that each board is straight and does not have a twist. Make sure that all of the cuts are square, which will make the assembly easier. The ends can be screwed together with 3” or 3-1/2” rust resistant deck screws, putting 2 or 3-screws in each corner to hold the corners together. Pre-drilling the holes makes the job easier. Nails can be used but will not hold as well as screws and the screws can be backed out in the future to do any repairs.
The best place to assemble your raised bed is on a flat driveway or patio. The first 3-corners usually go together easily, but the last corner is often hard to get together properly. This is often due to a combination of warped wood and cuts that are not square. Wood clamps and a home-made lever can be made to straighten out the twist and allow you to drive the screws in the last corner of the raised bed. The last corner may not be perfect but you can place the raised bed so that the last corner is not noticeable.
After your raised bed frame is put together make sure that it is square. The easiest way to do this is to measure across each diagonal which should have the same measurement. Move one end either left or right until they do equal each other. To keep it square when you move the frame, just nail a board across the left side corner and the right side corner temporarily. Now you can move it to where you want it.
Another fast and easy way to put together a raised bed is by using metal raised bed corners such as those from Gardener’s Supply Company. These add a little bit to the cost, but are very sturdy and the corners will never pull apart from soil pressure. The metal corners are made from extruded aluminum and make it very easy to build a raised bed and give your raised bed an attractive finished look. Screws on the inside hold everything together.
The area where you want to put your raised bed should be fairly level. If the raised bed is not level, the soil will tend to be washed out toward the lower side from rain or watering.
Use a carpenter’s level to insure that all sides are level. The high side can be set slightly lower than the native soil level and the other side can be raised by placing soil, brick or stone to make it level. If there is a gap, back fill with some soil to cover the gap, so that your good garden soil does not leak out. Check all 4-sides and adjust as needed.
It is important that the raised bed gets 6 to 8-hours of sun so that your plants grow properly. If the only location that gets sun is on a slope, then you will have to terrace your raised beds. As you go up the slope the next raised bed will be higher than the one below it. On the uphill side of the raised bed you might use a 2 x 6 and on the downhill side you might make that side 8, 10 or 12-inches high, depending on the degree of the slope. The wood for the ends will be cut with an angle to match the sides. Again make sure that the raised bed is level.
Now all you need to do is fill it with some great garden soil to a level about 1 to 2-inches below the sides. This will allow you to have some room to put some shredded leaves or other type of mulch around your plants to keep out the weeds.
Garden Spikes newsletters give you timely information once or twice a month. Subscribe Free to the Garden Times newsletter below.
Your email address will only be used to send you a newsletter and will never be sold. You can unsubscribe at any time.
